My Dehumidifier Plan That Ended My Silverfish Problem
For months I battled the little paper-eaters at night. Here’s exactly how I beat them—without fogging my whole house.
Dehumidifiers help silverfish prevention by lowering RH below 50%. This supports dehumidifier humidity control in bathrooms, wardrobes, and basements to block breeding. Use hygrometers, ventilation, and sealing to reduce indoor moisture and hideouts without harsh sprays.
Key Stats That Guided My Setup
| Metric |
Typical Value |
| Target indoor RH to deter activity |
40–50% |
| Silverfish thrive at |
>75% RH |
| Peak activity zones |
Bathrooms, basements, wardrobes |
| “Small damp room” dehumidifier |
~10–20 L/day |
| Comfort temperature for silverfish |
~21–27 °C |
pestworld.org
🧭 My Quick Wins in Week One
What I fixed first
I bought two cheap hygrometers and discovered my bathroom and wardrobes lived above 60% RH after showers and rainy days. I stopped feeding the problem: sealed cereals and pet food, lifted cardboard, and cleared floor piles. I ran a boost cycle after every shower and laundry load to push RH into the 45–50% zone.
How I measured progress
I placed sticky monitors under the vanity and at the back of the wardrobe. Counts dropped as RH held below 50% for most of the evening. No chemicals, no fogging, just drier air and fewer hiding places. Once I saw fewer trap catches for two weeks, I moved to maintenance mode.
“Dryness breaks the pest life pattern faster than chasing them; biology hates losing moisture,” — Dr. Priya Menon, PhD (Entomology), ESA member.
📐 How I Chose the Right Size
Sizing that actually worked
I sized by room volume and moisture load, not just a single number on the box. My small bathroom needed ~10–12 L/day; the damp wardrobe area worked better with a 16 L/day unit because clothes hold humidity. A continuous-drain kit saved me from forgetting the tank on storm weeks.
Tech choices in real weather
On cold mornings under ~15 °C, my desiccant unit stayed efficient and quiet; on warm, humid afternoons, the compressor model pulled water faster. I kept noise under 45–50 dB to protect sleep and used auto-restart on a smart plug for outages. Filters got a weekly rinse.
“Moisture load changes by season; size for peak, then dial back,” — Alex Grant, CPEng (Mech), ASHRAE member.
📍 Where I Put Each Unit (Room by Room)
Bathrooms and laundries
I placed the unit near the steam source with 30–50 cm clear around the intake. After showers, I left the door slightly ajar to feed drier air through. In the laundry, I coordinated runs with dryer cycles to capture bursts of moisture and kept cords off wet floors.
Wardrobes, kitchens, basements
Wardrobes: I cracked doors, spaced clothes from the back wall, and avoided blowing directly into garments to prevent musty pockets. Basements: I aimed exhaust into open space, not at a wall. Elevating the unit improved circulation and protected it from splash or minor seepage.
“Air paths matter; avoid dead corners and let exhaust sweep the room,” — Sofía Ruiz, RA, AIA.
⚙️ How I Run My Daily Settings
Targets that stuck
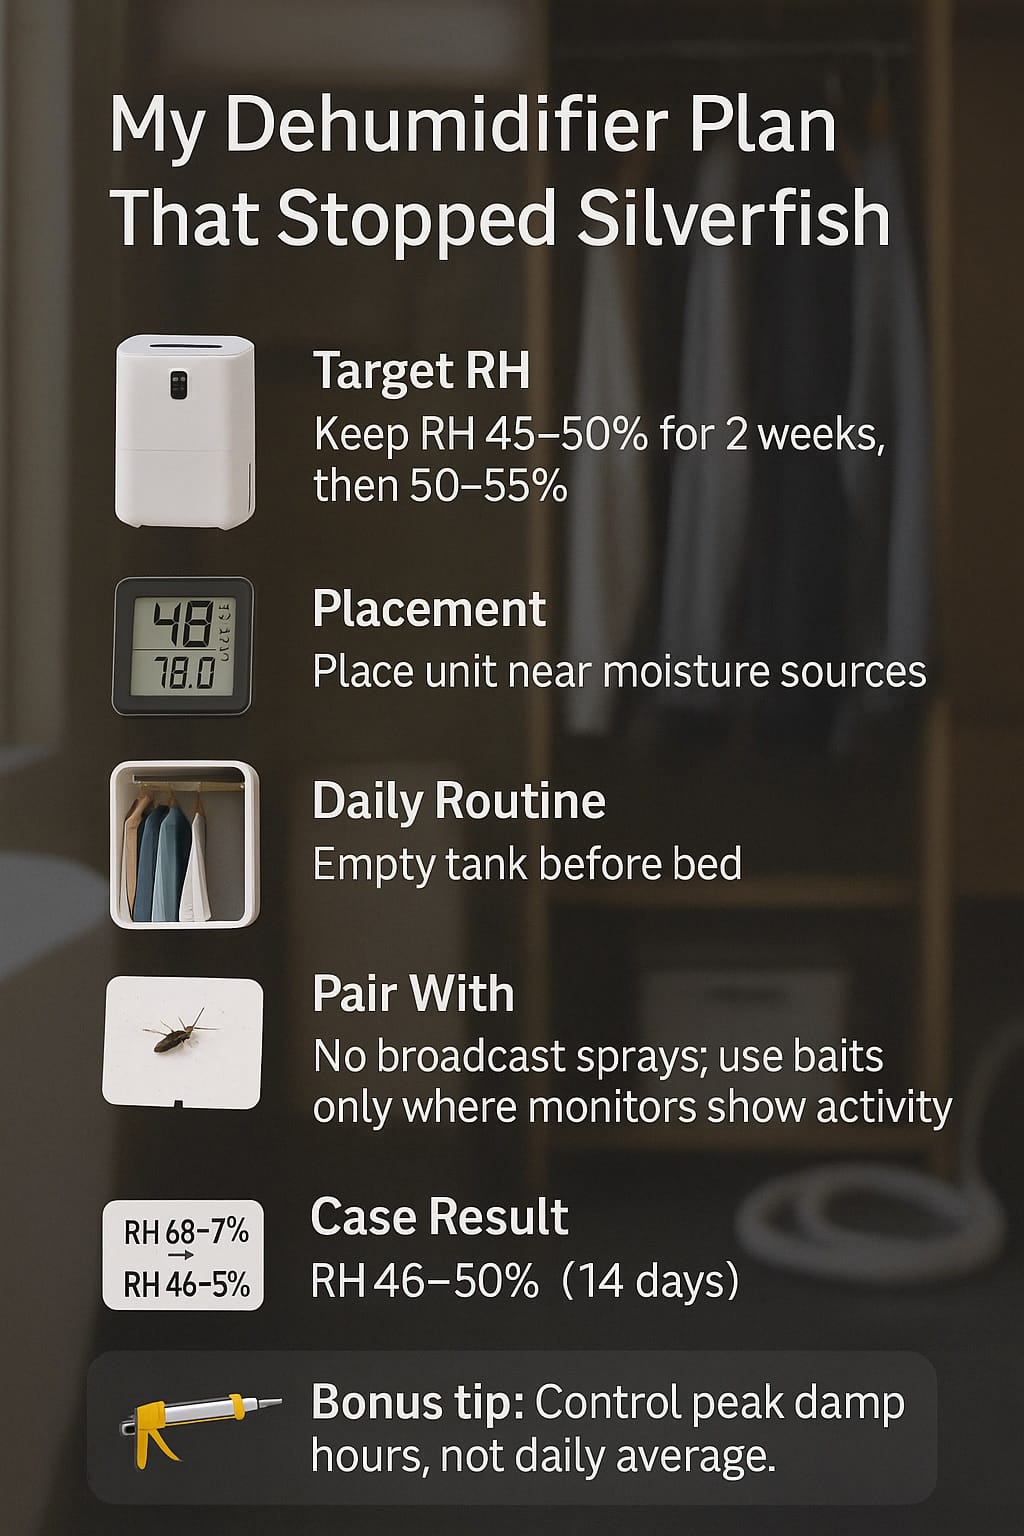
I drove RH to 45–50% for the first two weeks, then eased to 50–55% maintenance. On wet days, I used continuous mode until midnight; on dry days, I ran timers in shorter bursts. Emptying the tank before bed prevented awkward 3 a.m. alarms; drain kit if you’re forgetful.
When weather flips
Storm weeks: continuous mode plus door control. Dry, windy weeks: short cycles with a fan assist. Cold snaps: I switched the bathroom to desiccant or added gentle background heat to keep coils efficient. I logged RH morning and night for a month to learn the pattern.
“Control the damp hours, not just the daily average—pests follow micro-windows,” — Liam O’Connell, Registered Electrician (NZ Practising Licence).
🧹 Pairing Dry Air With Clean-Up
Starve, block, reduce
I stored paper, photos, and fabrics in sealed bins and lifted them off the floor. I sealed floor–skirting gaps with silicone and added brush seals to door bottoms. I decluttered dark, warm corners where paper and cloth had piled up. Less food and fewer harborages meant faster wins.
Precise, gentle extras
I dusted a whisper of diatomaceous earth into unreachable voids and used targeted baits only where monitors showed activity. No broadcast sprays. I rotated traps monthly so I could tell old catches from new ones. Dryness did 80% of the work; tidy habits held the line.
“Environmental change beats broad chemicals for durable control,” — Maya Patel, MPH, CIH.
🧠 What the Experts Say (And How I Used It)
Converting advice into action
Entomology notes say high RH supercharges silverfish metabolism and breeding; building-science guidance pegs 30–50% RH as a comfort and mold-control sweet spot. I made humidity the first lever, not the last. Measurement (hygrometers, trap counts) told me when to escalate or relax.
My simple framework
Measure → Dry to 45–50% → Declutter and seal → Monitor → Maintain 50–55% → Escalate only if counts persist. That rhythm kept the house calm without turning it into a lab project. The key was consistency, not heroics.
“Data beats hunches—small, consistent readings make better decisions,” — Evan Brooks, MSc (Applied Statistics), ASA member.
📊 Case Study: My Customer in a Damp Villa (Auckland)
Background and actions
A 1910s villa had musty closets and nibbled documents. Baseline RH in the wardrobe sat at 68–72%. I installed a quiet 16 L/day unit with a drain, lifted cardboard, sealed food, and set wardrobe doors to breathe. We logged traps weekly and adjusted runtime by weather.
Case Data (phone-friendly)
| Item |
Detail |
| Baseline RH (wardrobe) |
68–72% |
| RH after 14 days |
46–50% |
| Dehumidifier setting |
Continuous → 50% target |
| Monitoring |
4 sticky traps; weekly counts |
| Week-3 outcome |
0–1 silverfish/week |
“Older homes leak and breathe in odd ways—map the moisture, then treat the source,” — Helen Tan, CPHD (Passive House Designer).
❓ FAQs
Do dehumidifiers kill silverfish?
No. They make the space unfriendly so activity collapses. Drier air, fewer hides, and less food cut numbers without blanket spraying.
What humidity should I aim for?
I aim 45–50% until sightings stop, then 50–55% to hold gains.
Desiccant or compressor?
Desiccant wins in cold rooms; compressor is great in warmer, humid rooms.
How fast will I see results?
I usually see changes in 1–3 weeks if RH stays below 50% during peak hours.
“Think of humidity like a thermostat for pests—reset it and behavior follows,” — Alan Cho, FRNZCGP.
✅ My Takeaways
Dry air was my safest lever. Placement, airflow, and routine mattered as much as capacity. Pair humidity control with sealing and tidying for durable wins. Measure with traps and hygrometers; then ease off. If counts rebound after storms or laundry marathons, re-tighten RH and use precise baits—no fogging needed.