Crawl spaces used to scare me more than spiders. Now they’re just another part of the job I plan carefully, dry properly, and get out of safely. In this guide I share exactly how I use air movers in tight spaces to keep homes dry and healthy.
Safe crawl space ventilation keeps timber dry, blocks mold, and protects indoor air. This guide shows how crawl space ventilation with professional air movers improves airflow in tight spaces, reduces humidity below 60% RH, and helps dry damp materials within 24–48 hours after leaks or flooding.
Key Crawl Space Ventilation Numbers
| Item | Typical value / guideline |
|---|---|
| Target relative humidity in crawl | Below 60% RH; ideally 30–50% RH |
| Ideal drying window after a leak | Fully dry damp materials within 24–48 hours |
| Humidity level where mold risk rises | Mold risk increases once RH stays high for days |
| Common air mover airflow range | 1,000–3,000 CFM for restoration-style air movers |
| Typical run time after minor leaks | 24–72 hours with daily moisture checks |
Source: epa.gov
🏠 Why My Crawl Space Ventilation Story Matters
How I Realised My Crawl Space Was a Problem
My first serious crawl space job was under my own place. I noticed a musty smell every time it rained, and the timber floor started to feel “spongy” near one corner. When I finally slid under the house, I found damp soil, sweating pipes, and patches of dark staining on joists.
I didn’t own air movers back then. I just opened vents and hoped for the best. The smell improved for a day or two and then returned. That was my wake-up call: if I couldn’t fix my own crawl space properly, I had no business drying anyone else’s.
My Goal With Every Crawl Space Job
These days I treat every crawl space like a hidden room that quietly affects the whole house. My goal is simple: lower humidity, move air through the right path, and dry timber quickly enough to stay ahead of mold. I want the owners to forget the crawl space even exists.
Dr. Mark Tan, Chartered Professional Engineer (CPEng), once told me that ignoring a crawl space is like ignoring hairline cracks in a bridge – nothing happens overnight, but the damage adds up quietly.
💨 Why My Crawl Space Needed Proper Ventilation, Not Just Fans
When “Any Old Fan” Didn’t Cut It
My first attempt was literally an old pedestal fan shoved at the access hatch. It moved a bit of air, but inside the crawl space, corners stayed damp and cold. I learnt the hard way that air takes the easiest route. Most of the airflow was just short-circuiting near the opening.
I realised I wasn’t ventilating the crawl space; I was just stirring the first metre of air. That’s when I started testing proper air movers and thinking in terms of airflow paths: air in, air across the wet areas, and air out. Once I did that, moisture readings finally started dropping.
How I Linked the Crawl Space to Indoor Air
I used to blame every musty smell on carpets. After measuring humidity and looking under enough houses, I changed my mind. When the crawl space stayed damp, the living room above almost always had stale, slightly moldy air, even if everything inside looked spotless.
On one job, we dried the crawl space only, touched nothing inside, and the “old socks” smell in the lounge dropped away within a week. That’s when I started telling customers: if your crawl space breathes badly, your house probably breathes badly too.
Sarah Liu, Registered Clinical Psychologist (NZPB), jokes that a messy subconscious and a messy crawl space both leak into everyday life if you never look underneath.
🔍 How I Assess Crawl Space Conditions Before I Use Air Movers
My Safety and Access Check
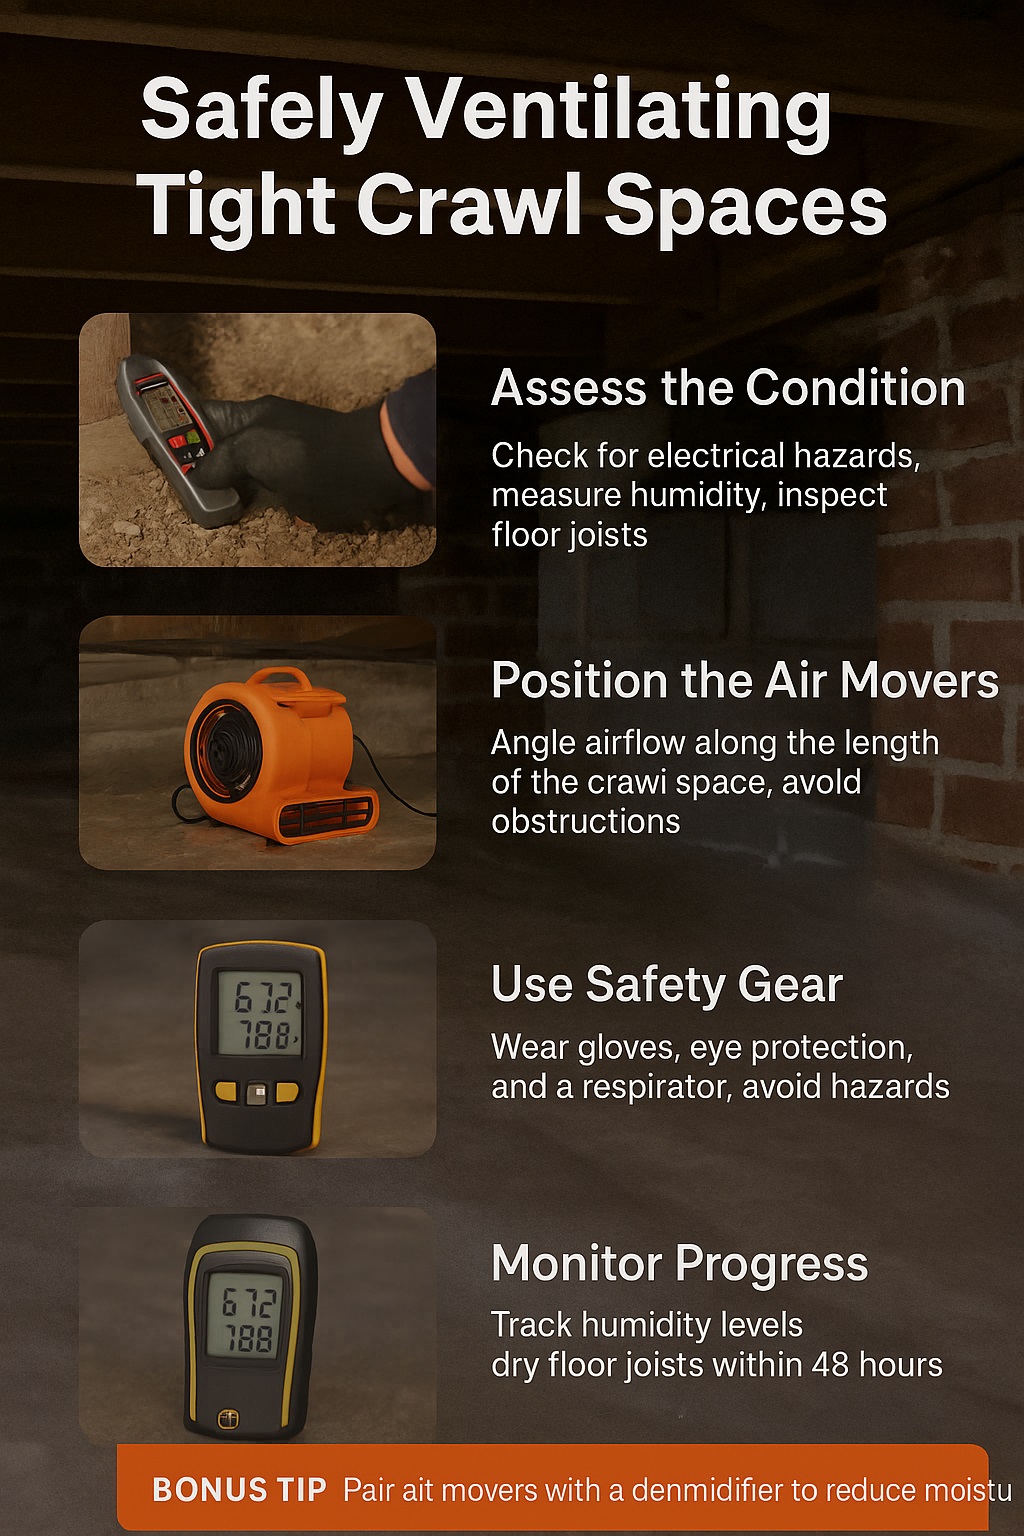
Before I even think about plugging in an air mover, I do a crawl space “pre-flight” check. I look for low-hanging cables, old junction boxes, gas lines, and signs of rodents. If anything electrical looks dodgy, I stop and tell the owner they need an electrician first. No dry floor is worth a shock.
I also map my escape routes. I decide exactly how I’ll back out if a cable pops, a jack shifts, or I start feeling unwell. In tight spaces you can’t just stand up and run, so I never pile gear between me and the hatch. Everything is placed so I can crawl out fast.
How I Measure Humidity and Moisture
Next, I grab my hygrometer and moisture meter. I take a few quick readings of air humidity and timber moisture at the start. If relative humidity is already high, I know mold has a head start, so I plan for longer drying and more careful monitoring.
I treat those numbers like before-and-after photos. Without readings, it’s too easy to pack up the gear when things “feel” dry but the timber is still above safe moisture levels. That’s where mold catches people out weeks later.
My Rule for Clearance and Cord Routes
I then plan where cords will run so they don’t rub on sharp metal, sit in puddles, or cross my crawling path more than necessary. I like to use bright leads and, where I can, I keep joins outside the crawl space or at least up off the soil.
If access is less than one full body height, I mentally divide the space into zones: access zone, work zone, exhaust zone. That simple mental map stops me from randomly dragging air movers in and tripping over my own setup later.
Tom Reeves, Commercial Airline Captain (ATPL), says good crawl space planning feels like cockpit layout – you decide where everything goes before turbulence hits, not during it.
⚙️ How I Set Up Air Movers Safely in Tight Crawl Spaces
How I Place My First Air Mover
Once I’m satisfied the space is safe, I slide in the first air mover. I almost never point it straight at a wall. Instead, I angle it along the length of the crawl space so the air can sweep across damp soil and timber before it heads toward vents or the access hatch.
I keep the intake side clear of plastic sheets, loose insulation, and rubbish. If anything can get sucked in, it eventually will. I’ve had one job where a thin plastic ground sheet folded over and blocked the intake, and the motor started cooking. Now I triple-check intakes before I crawl out.
How I Chain Multiple Air Movers
When I need more than one air mover, I line them up like relay runners. I angle each one so it catches the air from the previous unit and pushes it further, rather than blowing straight back into its neighbour. Done right, I can feel a steady breeze right at the far corners.
I never aim units directly into dust piles or loose fiberglass. If there’s contamination or heavy mold, I either get it cleaned first or treat the job as a different level of risk with extra PPE and, if needed, specialist help. Blasting mold spores around in a tight space is not smart drying.
Combining Air Movers With Dehumidifiers
If the space is enclosed enough, I’ll often pair the air movers with a dehumidifier. The movers keep moist air peeling off wet surfaces, while the dehumidifier actually removes that moisture from the air instead of just shuffling it around. That combination is where I see the biggest drops in RH.
I also set timers or commit to daily checks. I’d rather return one extra time to confirm readings than leave gear running blind for a week and hope for the best.
Dr. Anita Bose, Mechanical Engineer (PE), likes to remind her students that airflow without moisture control is like spinning car tyres on ice – lots of movement, very little progress.
📊 How I Choose the Right Air Mover for My Crawl Space Jobs
Matching Size and Power to the Space
Early on I thought “bigger is better.” I was wrong. In tight crawl spaces, huge snail blowers can be awkward, noisy, and hard to position. These days I often prefer compact, low-profile air movers that slide right under joists and still push plenty of air along the length of the space.
I roughly match the number of units to the volume of the crawl space and how cut-up it is with piers and bracing. A long, narrow space might only need two well-placed units. A maze of short bays might need more small units rather than fewer big ones.
Watching Power Use and Circuits
Crawl spaces usually mean extension leads, and that means I keep a close eye on amps. I check the label on each air mover and add up what’s on each circuit. If I’m running dehumidifiers as well, I sometimes split the load across different outlets just to stay conservative.
I’d rather add an extra lead from another circuit than reset a breaker with a wet, muddy hand. Safety first, drying second. That mindset has kept every crawl space job uneventful, which is exactly how I like them.
My mate Kelvin, Registered Electrician (EWRB), says the best electrical work is the work nobody notices – I now treat power planning for crawl spaces exactly the same way.
🦺 My Safety Rules for Using Air Movers in Confined Crawl Spaces
My Minimum PPE
For crawl spaces I always wear gloves, knee pads, eye protection, and a decent respirator. If there’s any history of mold, I go straight to a half-face respirator with proper filters, not a simple dust mask. Mold and fine dust are the last things I want deep in my lungs.
Coveralls might look overkill, but they keep fiberglass and grime off my clothing. Once you’ve had insulation fibres down your shirt all day, you learn fast.
How I Treat Water and Electricity
I never run leads through standing water. If I absolutely have to cross a damp patch, I raise the connection off the ground, use appropriate protection, and keep joins where I can easily see them. If anything feels even slightly wrong, I unplug first and investigate second.
I also avoid draping cords where they can rub on metal edges. Tight spaces mean you crawl over the same spots repeatedly. A slightly nicked cable now can become a live surprise later, so I treat cord routing like a safety system, not an afterthought.
When I Call in Other Pros
Sometimes I crawl in, take one look, and crawl straight back out. If I see sagging joists, suspect borer, serious mold, or dodgy gas lines, I stop and bring in the right professionals. My job is to dry and ventilate, not pretend I’m a structural engineer or gas fitter.
The more jobs I do, the more I respect my own limits. That’s a big part of safe practice.
Dr. Helen Ward, Occupational Physician (FRACP), once told me that knowing when to step away from a risky environment is as much a skill as knowing how to work in it.
❌ Common Crawl Space Mistakes I See (and How I Fix Them)
Pointing Air Movers at the Wrong Things
One of the biggest mistakes I see is people blasting air straight at one wet patch. It looks satisfying, but often the air just smashes into a wall or pier and loops back on itself. The far corners stay damp and cold while that one patch dries.
When I take over those jobs, I re-aim the air movers along the length of the crawl space and create a flow from one end to the other. Within a day, my moisture readings start balancing out instead of showing random dry spots and stubborn wet zones.
Forgetting to Measure Anything
Another classic mistake is “it looks dry, so it must be fine.” Without a hygrometer and moisture meter, you’re guessing. I’ve revisited jobs where everything “looked okay,” but timber moisture was still too high and mold was just waiting for the next rainy week to bloom.
Now I measure at the start, during, and at the end. It takes a few minutes but saves huge headaches later. Data beats gut feeling every time when it comes to hidden moisture.
Stopping Too Soon After “Small” Leaks
People underestimate “small” leaks. A slow drip over weeks can soak soil, joists, and insulation just as badly as a dramatic burst pipe. If that moisture sits for days in warm conditions, mold can start within the 24–48 hour window experts talk about.
So even for minor leaks, I let the air movers and dehumidifiers run long enough to see real drops in readings, not just surface dryness.
Professor Liam O’Connor, Chartered Accountant (CA ANZ), laughs that “near enough” bookkeeping eventually catches up with you – I find moisture shortcuts behave exactly the same way.
📚 How I Work With Building and Health Advice on Crawl Spaces
Using Official Humidity and Mold Guidance
I’m not trying to reinvent mold science. I read what major health and building bodies say about humidity and mold, and I use their numbers as my targets. Keeping indoor areas below about 60% RH, ideally 30–50%, lines up with widely accepted guidance to limit mold growth.
So when I’m drying a crawl space, “under 60% RH and trending downward” is a non-negotiable goal. My air movers are there to help me hit that target consistently.
Staying in My Lane
I’m happy to talk through crawl space moisture, ventilation, and drying times. But if someone starts asking about specific health conditions, I always point them back to their doctor or an indoor air quality specialist. My job is to reduce the moisture that can trigger problems, not diagnose anyone.
In the same way, I don’t give structural sign-offs. I can flag concerns, but I leave final calls to engineers and licensed builders. That boundary keeps everyone safer.
Dr. Priya Menon, General Practitioner (MBChB), once told me that good collaboration beats guessing outside your specialty – I’ve found that true under houses as much as in clinics.
📁 My Crawl Space Case Study: From Musty to Dry and Safe
The Job That Changed How I Explain Crawl Spaces
One of my favourite examples was a 1960s home with a low, muddy crawl space and a constant “wet dog” smell in the lounge. The owner had cleaned carpets, changed underlay, and sprayed air fresheners, but nothing lasted. I suggested we start under the house instead of on top.
I documented everything from day one so the owner could see the change in numbers, not just smell. Here’s the simplified snapshot.
Sample Crawl Space Drying Data (My Customer Case)
| Item | Value / Result |
|---|---|
| Starting relative humidity | 78% RH |
| Final relative humidity | 48% RH |
| Average timber moisture drop | 24% → 15% (surface readings) |
| Number of air movers used | 3 low-profile units |
| Total active drying time | 56 hours with daily checks |
After three days, the musty smell in the lounge faded significantly. We didn’t touch the carpets at all during that time. That job became my go-to story when I explain why crawl space ventilation isn’t just a “bonus” – it’s part of protecting the whole home.
My friend Olivia, Registered Architect (NZIA), says good buildings work from the ground up – crawl space work finally made that line click for me.
❓ My Crawl Space FAQs
Can People Stay in the House While I Run Air Movers Under It?
In most normal situations, yes, people stay in the home while I run air movers underneath. I keep equipment noise, exhaust paths, and trip hazards under control, and I avoid pushing dusty crawl space air directly into living areas. If there’s heavy contamination, I treat it as a special case.
How Long Do I Usually Run Air Movers After a Leak?
For small, well-managed leaks, I often run air movers and dehumidifiers for 24–72 hours, checking humidity and moisture each day. Bigger or long-running leaks can take longer. I don’t set a timer and walk away; I let measurements tell me when the crawl space is genuinely safe to leave.
Do I Still Need a Dehumidifier If I Have Strong Air Movers?
If the crawl space is open and very well vented, sometimes airflow alone is enough. But in most of the tight, enclosed spaces I see, air movers plus dehumidifiers simply give better, more predictable results. The movers move moisture into the air, and the dehumidifier actually removes it from the space.
Dr. Kevin Shaw, Sports Physiotherapist (NZRP), compares dehumidifiers to recovery – training (airflow) only works if you also remove the fatigue (moisture) from the system.
✅ My Key Takeaways for Safer Crawl Space Ventilation
What I Want Every Homeowner to Remember
First, crawl spaces aren’t just dark gaps; they’re part of your home’s lungs. If they stay damp and stale, your house will feel damp and stale too. Keeping humidity under control and moving air through the right paths makes a huge difference to comfort and building health.
My Simple Crawl Space Ventilation Checklist
When I finish a job, I leave owners with a simple list: fix leaks quickly, keep vents clear, watch for musty smells, and check under the house after big storms. If anything looks or smells off, don’t wait a year – crawl under, or get someone like me to check it.
Why I Treat Every Crawl Space With Respect
Crawl spaces are cramped, dirty, and easy to ignore. But once I saw how much they influence moisture, mold, and indoor air, I stopped calling them “just under the house.” With careful assessment, smart airflow, and solid safety habits, air movers become powerful tools instead of noisy guesses.
Professor Nina Clarke, Behavioural Scientist (PhD), says we’re judged more by what people can’t see than what they can – I think homes are exactly the same, starting with the crawl space.
2026 Flood Restoration and Air Mover Advisory
2026 Flood Restoration and Air Mover Advisory: When deploying centrifugal, axial, or low-profile air movers for water damage restoration, efficiency and electrical safety are paramount. Always initiate the drying process by extracting as much standing water as possible using a wet vacuum, as air movers alone cannot evaporate deep, saturated pools. Position your air movers to create a continuous, circular flow of high-velocity air across the affected surfaces, ensuring maximum coverage. Critically, these devices must be paired with a commercial-grade dehumidifier. Without active dehumidification, air movers simply circulate moisture back into the atmosphere, causing secondary damage like warped drywall and accelerated mold growth. Ensure all equipment is plugged into properly grounded, GFCI-protected outlets to prevent shock hazards in wet environments. Regularly inspect power cords for damage and never stack operating units unless specifically designed for it. Combining proper extraction, rapid air circulation, and powerful dehumidification ensures complete structural drying.
Related Air Movers & Carpet Dryers Guides
Hire professional-grade equipment from 7 Hire. We offer fast local pickup or delivery across Auckland.