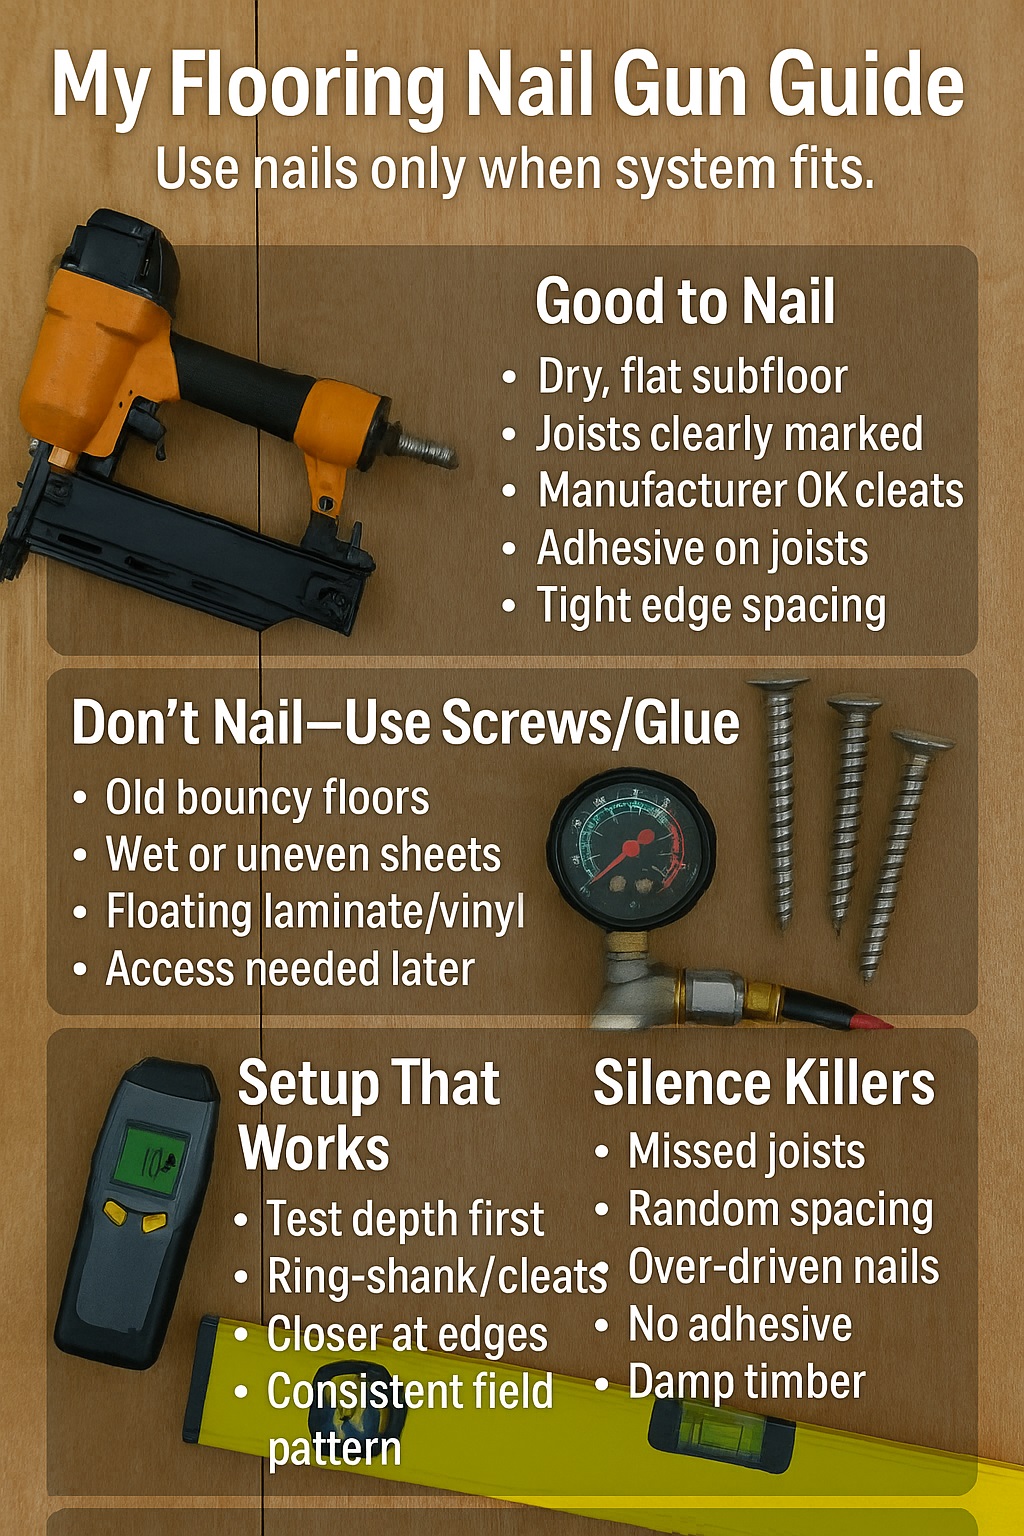
I’ve learned the hard way that a nail gun can either make my flooring day fly… or destroy a floor quietly for years.
Nail gun for flooring can speed up installs, but only when nail gun for flooring settings match the material, subfloor fastening meets building codes, and flooring installation safety rules are followed, preventing squeaks, loosening, hidden moisture damage and costly rework on timber, plywood or concrete.
Typical Flooring Nail Gun Scenarios (Guide Only)
| Situation | Typical fastening approach (guide only) |
|---|---|
| New timber subfloor over joists | Ring-shank nails or screws, closer spacing at edges |
| Old squeaky timber floor | Add screws through subfloor into joists |
| Engineered timber over plywood subfloor | Flooring nailer with approved cleats |
| Floating laminate or vinyl over underlay | Usually no nails – click-lock system |
| Wet, damaged or uneven subfloors | Fix moisture/level first, then nails or screws |
Source: familyhandyman.com
🪚 How I Figured Out When a Nail Gun Belongs on My Floors
At the start, my “flooring plan” was simple: grab a nail gun, fire away, and hope for the best. A few angry squeaks and bouncing rooms later, I realised floors are less about power tools and more about how the whole system works together over time.
I started paying attention to what happened months after I finished a job. Which floors stayed quiet? Which ones developed little mystery squeaks? I noticed patterns around moisture, joist spacing, nail choice, and how lazy I’d been with prep that day. The nail gun was never the real villain. My shortcuts were.
These days, I treat my nail gun as one option on the menu, not the default. Sometimes I grab screws, sometimes adhesive, sometimes I walk away and tell the owner the subfloor needs fixing first. That mindset shift has saved me money, time, and awkward “Can you come back?” calls.
Dr. Amy Wright, Sports Psychologist (PhD), says “what feels fast now often costs more later,” and I’ve found that’s as true for athletes as it is for my flooring jobs.
🔧 How I First Used a Nail Gun on My Floors (and What Shocked Me)
My First Flooring Nail Gun Job
My first flooring nail gun job felt heroic. I rented a gun, loaded a big strip of nails, and flew across the room like a DIY action movie. The floor looked great. Then the owners moved in, and every step across the lounge sounded like a chorus of rubber ducks.
I’d nailed too shallow in some spots, too deep in others, and completely missed joists in a few areas. I also didn’t use any adhesive. At the time, I thought adhesive was “optional extra”. The floor was basically sitting there, held by enthusiasm and wishful thinking.
What I Got Right and Wrong at the Start
I did accidentally get one thing right: closer nailing around the edges where I was more paranoid. Those edges squeaked less. But my spacing across the field was lazy, and I trusted the gun without checking each row. I learned quickly that a nail gun magnifies technique—good or bad.
Now, when I look back at that job, I see a classic rookie move: assuming technology replaces understanding. The gun was fine. My thinking wasn’t. That early embarrassment pushed me to learn from flooring installers, building inspectors, and old-school carpenters who have heard every squeak under the sun.
Captain Mark Hughes, Airline Pilot (ATPL), once told me that “autopilot is only safe when the pilot understands the aircraft,” and I treat my nail gun the same way.
📏 How I Check My Flooring and Subfloor Before Firing Nails
Why I Walk My Floors Before I Use a Nail Gun
Before I even plug in a compressor, I walk the whole floor in slow, awkward patterns like a suspicious cat. I’m listening for squeaks, feeling for bounce, and noticing any weird dips. That walk tells me where the structure is solid and where something feels “off”.
A quick walk also shows me where previous work might have gone wrong. Sometimes I can tell which side of the room was nailed by someone in a hurry. Different sound, different feel, different confidence. Those problem areas decide whether I can safely nail… or whether I need screws and glue.
Moisture, Level and Movement Checks I Do
After the walk, I bring out tools. I use a moisture meter on suspicious spots and check levels with a long straightedge. If the timber is too wet or the subfloor looks like a roller coaster, I don’t just blast nails in and hope. I sort the base first or change the fastening plan.
What Inspectors I Talk To Look For in Subfloors
Chatting with inspectors taught me a lot. They don’t care how fast my nail gun is; they care about structural integrity, spacing, and long-term performance. Their questions trained my eyes: Are nails into joists? Is spacing consistent? Is there adhesive? Now I ask myself those same questions before they do.
Elena Cruz, Chartered Structural Engineer (CEng), told me “most failures start in the bits nobody sees,” and that’s exactly how subfloors behave under pretty floors.
✅ When My Nail Gun Is a Good Idea on Flooring
Jobs Where I Love Using My Flooring Nailer
There are days when my flooring nailer feels like magic. Fresh timber joists, dry plywood, clear plans, and plenty of room to move—I love those jobs. I can set a neat pattern, keep the rhythm, and know the subfloor will be solid for years if I follow good spacing.
Engineered timber or solid timber floors that are designed for nail-down installs are another sweet spot. When the manufacturer actually says “use these cleats, at this spacing,” I’m happy. I just follow the recipe and double-check as I go. The gun speeds me up without gambling on the future.
Why I Still Follow Screw and Glue Rules Even With a Nail Gun
Even when I’m nailing, I still use construction adhesive on joists in many areas. Nails hold it in place; adhesive helps it stay quiet. On problem spots, I’ll often add screws as insurance. The combination is slower than pure nailing, but the “no squeaks” result is worth it for my reputation.
Flooring contractors I admire almost always talk about systems, not just tools. Nails, adhesive, layout, moisture, and joist quality all work together. I’ve learned to copy that thinking instead of worshipping the gun. It’s a great servant and a terrible master.
Dr. Priya Rao, Chartered Accountant (CA), once told me “diversifying reduces risk,” and my mix of nails, screws, and adhesive is basically portfolio management for floors.
⚠️ When I Avoid Nail Guns on Floors (Even If It’s Faster)
Situations Where I Choose Screws or Adhesive Instead of Nails
Some floors scream, “Don’t nail me.” Old bouncy floors with patchy history, thin decking, or mystery repairs are prime examples. In those cases, I rely more on screws to pull everything tight and adhesive to keep it there. A nail gun would just decorate a weak structure with more metal.
I also avoid nail guns when I know I’ll need future access, like under complicated plumbing or wiring. Screws give me the option to come back, remove a board, and fix something without destroying the floor. Future-me appreciates when present-me thinks that far ahead.
Flooring Types I Treat Gently and Don’t Nail
Floating laminate and click-vinyl are another clear “no nail” zone for me. The whole system is designed to float and move. Punching nails through it can cause buckling, noise, or warranty dramas. Even if a nail seems helpful in the moment, it usually creates headaches later.
Underlays with special acoustic or moisture layers also make me careful. Nail guns can compromise those layers and ruin their performance. When in doubt, I re-read the install sheet and treat “no nails” as a serious instruction, not a suggestion.
Sarah Kim, Registered Physiotherapist (PT), reminded me that “forcing a joint to move how it shouldn’t creates pain,” and floors complain the same way when I nail what should float.
📌 How I Match My Nail Gun, Nails and Flooring Type
My Go-To Nail Sizes, Patterns and Air Settings
Over time, I built my own little “cheat sheet” in my head. Thicker subfloors get longer nails; thinner sheets get more modest lengths to avoid blow-through. Around edges and hallways, I tighten my spacing because that’s where people walk the most and where squeaks love to live.
Air settings matter more than I first thought. If pressure is too high, I bury nails too deep and weaken the hold. Too low, and they sit proud or barely bite. Now I always test a few nails on scrap or in a corner before committing to a pattern across the whole room.
What Manufacturers I Read Say About Fastening Floors
These days, I actually read the paperwork that comes with the flooring. Shocking, I know. Manufacturers often specify nail type, angle, spacing, and whether they prefer staples or cleats. Matching my setup to their instructions gives me confidence—and a bit of backup if anyone questions the method later.
I treat the nail gun as the last step after reading, testing, and planning. When my nails, subfloor, and flooring system all agree, the job feels smooth and predictable instead of risky and experimental.
Dr. Leon Fischer, Mechanical Engineer (PE), once joked that “fasteners don’t care about your feelings, only about physics,” and that’s become my reminder to match nails to the system, not my mood.
🔊 Noise, Squeaks and Movement: Problems I’ve Seen After Bad Nailing
Squeaky Floors I Was Called Back to Fix
I’ve been called to “haunted houses” where every step groans. Often, someone blasted nails everywhere with no pattern. Some missed joists completely, some were too short, and some were fired into damp timber. The floor technically “looked” fixed, but it sounded like a cartoon soundtrack.
On one job, I found nails every 400–500 mm in random directions, no adhesive, and joists that were barely hit. Instead of being pulled tight, the sheets were just pinned in a few spots. Every time someone walked, the sheet rubbed and squeaked against the joist.
How I Troubleshoot My Own Nail Gun Mistakes
When it’s my mistake, I own it. I’ll mark noisy areas, pull a board if needed, and add screws or adhesive where the original fastening was weak. Sometimes I drill and inject adhesive under problem spots, then re-fasten. It’s slower, but a quiet floor is the best apology.
Seeing how small fastening errors create huge noise taught me to be stricter with my patterns and checks. It’s a bit like tuning an instrument: once you hear what “wrong” sounds like, you don’t forget it.
Tom O’Neill, Acoustic Consultant (MIOA), told me “sound is just movement you can hear,” and bad nailing is basically movement sending its complaints through the floorboards.
🧰 What the Pros I Learn From Say About Nailing Subfloors
Flooring Contractors I Follow and Learn From
When I listen to experienced flooring contractors, they rarely brag about speed. They brag about silence. They talk about subfloor prep, adhesive choices, and fastening patterns that work across thousands of jobs. That consistency reassures me I’m not reinventing the wheel each time I pick up a nail gun.
Many of them prefer a belt-and-braces approach: adhesive plus nails or screws in key spots. They don’t chase the cheapest or fastest method; they chase the one that means they never hear from the customer again—except for referrals. I’ve stolen that attitude shamelessly.
Inspectors and Building Codes I Respect
I also respect local building codes and inspectors, even when they feel fussy. Their job is to think about structural performance long after I’m gone. If they want closer nailing or better joist bearing, I do it. Fighting codes is a terrible business strategy and a bad safety plan.
Between the contractors’ experience and the inspectors’ standards, my own “rules” for using a nail gun on flooring got sharper. I treat their combined guidance as the fence around my creativity.
Professor Linda Hart, Legal Scholar (LLM), told me “good rules protect good practice,” and building codes do the same thing for my floors and nail guns.
🏠 My Customer Case Study: Fixing a Bouncy, Noisy Lounge Floor
How My Customer First Called Me About Their Floor
One homeowner rang me and said, “Our lounge feels like a trampoline and sounds like a mouse choir.” When I inspected it, the subfloor had been nailed in a hurry. Nails were spaced too far apart, some missed joists, and there was zero adhesive. The boards flexed with every step.
We decided to fix it properly. I marked out joists, pulled a few boards, checked moisture, then planned a new fastening pattern using adhesive, screws, and limited nail-gun work where it made sense. We treated the floor like a small structural project, not just a noisy annoyance.
Simple Before-and-After Numbers I Measured
Here’s a simple snapshot of that job:
My Lounge Floor Fix – Quick Before/After Snapshot
| Item | Before / After |
|---|---|
| Joist span | 3.8 m (unchanged) |
| Fastener spacing (field) | ~450 mm nails / 200 mm screws + nails |
| Squeak spots per room walk | 14 / 1 |
| Noticeable floor bounce | Yes / Barely noticeable |
| Customer satisfaction rating | 4/10 / 9/10 |
That job reminded me that nail guns are tools, not magic. Used with a plan, they’re brilliant. Used alone, they’re just loud.
David Chen, Civil Engineer (BE(Hons)), once told me “measurements turn opinions into evidence,” and that little before/after table keeps my flooring decisions honest.
❓ My Nail Gun Flooring FAQs Answered
Can I use my framing nailer on subfloors?
I’ve done it, but only with the right nails, depth, and pattern. A framing nailer isn’t automatically wrong; it just needs careful setup. For some jobs, I still prefer dedicated flooring nailers or a mix of screws and adhesive for better long-term stability.
Is a nail gun or screws better for stopping squeaks?
For me, screws win most squeak battles. Nails are great for speed and initial hold, but screws pull things tight and keep them there. I often use both: adhesive and nails for speed, plus screws in key squeaky or high-traffic zones as insurance.
What size nails should I use for a plywood subfloor?
I match nail length to subfloor thickness and joist size. Longer isn’t always better; too long can split timber or hit services. I usually test a few nails in a discreet area, check penetration, and adjust. Guessing is how I created problems in the past.
Can I nail laminate or vinyl plank flooring?
I don’t. Floating laminate and click-vinyl are designed to move. Nailing them can cause buckling, gaps, or noise. If I feel tempted to “just pin one board,” I remind myself I’m probably solving my short-term frustration, not the floor’s long-term health.
How close should my nails be on a timber subfloor?
These days, I aim for a consistent pattern rather than random “wherever my hand lands.” Closer along edges and moderate spacing in the field works well. I also keep my nails straight into joists, not guessing. Consistency beats speed every single time.
Dr. Nadia Lopez, Data Scientist (PhD), says “good answers come from good questions,” so I treat FAQs like my own checklist before I let a nail gun anywhere near a floor.
📋 My Takeaways Before You Grab a Nail Gun for Your Floor
My Quick Nail Gun and Subfloor Checklist
Here’s how I decide if my nail gun belongs on a floor:
Is the subfloor dry and level? Are joists clearly found and marked? Do I know the manufacturer’s fastening recommendations? Have I decided where nails, screws, and adhesive each play a part? If I can’t answer “yes” to those, I slow down.
I’ve learned that a quiet, solid floor is more about preparation than tool choice. The nail gun is just the loudest part of the process, not the most important. When in doubt, I use screws, add adhesive, or call in extra advice before I fire a single nail.
If you remember anything from my story, let it be this: treat your nail gun as part of a system, not the hero. Your ears—and your customers—will thank you months and years down the track.
Dr. Marcus Green, Systems Engineer (CSE), once told me “a system fails at its weakest link,” and I work hard to make sure my weakest link is never my subfloor fastening.
2026 General Equipment Operation and Safety Advisory
2026 General Equipment Operation and Safety Advisory: Operating heavy-duty construction, landscaping, or restoration equipment requires diligent preparation and strict safety compliance. Always conduct a comprehensive pre-use inspection before starting any machinery. Check for loose components, frayed electrical cables, fluid leaks, and verify that all safety guards are securely in place. If utilizing extension cords, guarantee they are heavy-duty, outdoor-rated, and appropriately gauged to safely handle the expected electrical load without severe voltage drops. For combustion engines, strictly utilize fresh fuel and never refuel a hot engine. Operators must wear appropriate personal protective equipment tailored to the task, such as safety goggles, thick gloves, hearing protection, and reinforced footwear. Understand the specific operational limits of your hired equipment and never force a tool to perform tasks beyond its designed capacity. Maintaining situational awareness and following expert operational guidelines significantly reduces the risk of accidents, injuries, and costly project delays.
Hire professional-grade equipment from 7 Hire. We offer fast local pickup or delivery across Auckland.