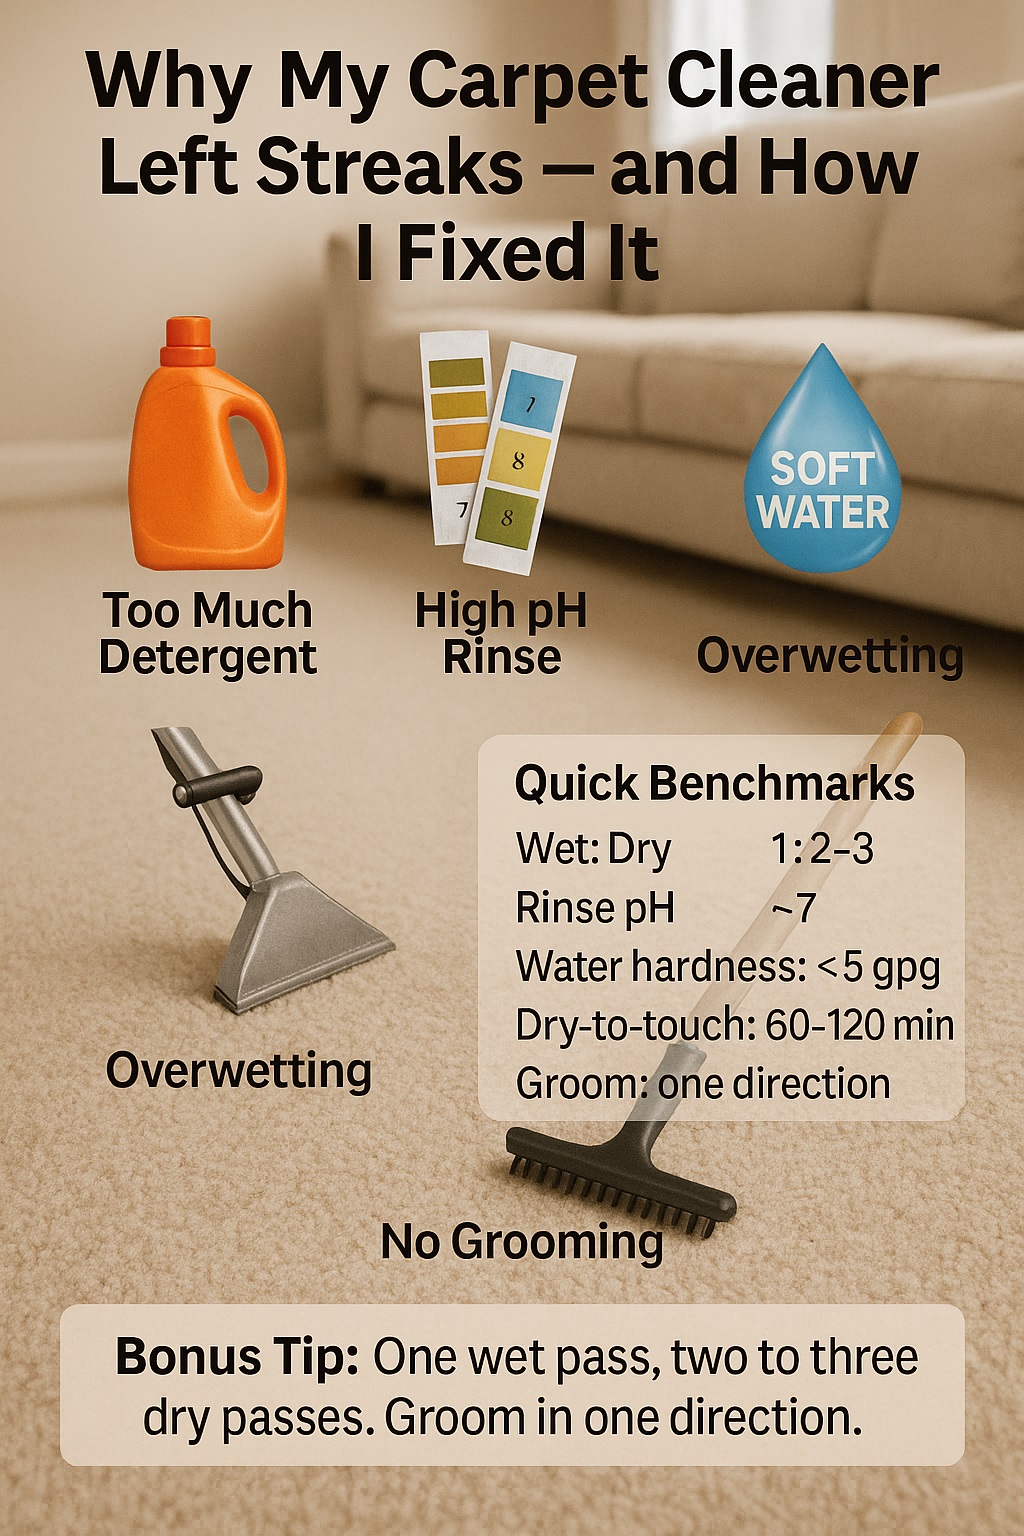
I thought I’d nailed the clean—until the carpet dried and stripes showed up like zebra crossings.
Carpet cleaner leaving streaks often comes from residue, overwetting, or uneven extraction. carpet cleaner leaving streaks may be caused by detergent residue, wicking, or uneven extraction from poor passes. Fixes include neutral pH rinsing, soft water, slower wand speed, two dry passes per wet pass, and pile grooming.
Quick Benchmarks for “Carpet Cleaner Leaving Streaks”
| Metric | Recommended / Typical Range |
|---|---|
| Wet : Dry passes | 1 wet : 2–3 dry |
| Rinse pH target | ~7 (near neutral) |
| Water hardness | < 3–5 gpg (soft) |
| Dry-to-touch window | 60–120 minutes |
| Final grooming | One direction, even lanes |
Source: iicrc.org
Browse our available hire gear and get back to work today!
🧼 My Quick Story: The Day I Made My Carpet Look Worse
What happened
I cleaned a medium-pile lounge and felt proud… until drying turned the floor into light-and-dark lanes. My nozzle tracks were obvious at every angle. I learned fast that looks can lie when the pile is wet, and the real truth shows up only after even, controlled drying.
The on-the-spot checks
I grabbed pH strips, hardness strips, and ran my passes again on a small test square. I slowed my stroke, added extra dry passes, and finished with a groom. The test patch looked even. That told me the problem wasn’t the carpet—it was my timing, chemistry, and technique.
“Systems beat strength,” notes Aiden Brooks, CPEng. “Consistent inputs produce consistent outputs.”
🧠 Why I See Streaks After Cleaning (Root Causes in Plain English)
Residue lines
Streaks love residue. If my pre-spray is too strong or I skip a neutral rinse, detergent lingers and dries patchy. Residue changes how fibers reflect light, so tracks appear. Neutralising to near pH 7 stops the shimmer and helps colors settle back to normal.
Wicking and overwetting
If I overwet, moisture pulls soil up from the backing as it dries. Those dark shadows aren’t stains; they’re soil that rode the drying wave. I cut solution flow, increased dry passes, and boosted airflow so water leaves the carpet—without dragging dirt to the surface.
Nap distortion and hard water
If I push the wand too hard or brush in odd patterns, I bend the nap and create lines that look like color differences. Hard water adds mineral spots too. I soften the rinse water and finish with a gentle, one-direction groom to align the fibers.
“Light shows texture first,” says Maya Chen, NZIPP Photographer. “Surface direction changes brightness more than color does.”
🛠️ How I Actually Fixed the Streaks Step by Step
Measure first
I stopped guessing. I used pH strips on the rinse and a hardness strip on the fill water. If pH drifted high, I diluted. If hardness was above ~5 gpg, I used softened water or a portable softener. Good inputs made the whole job easier and more repeatable.
Reset technique
I slowed my wand to a steady, metronome pace. One wet pass, then two or three dry passes. I overlapped 25–50% so edges blended. I kept the wand angle consistent to avoid stop lines. I let my vacuum do the work instead of muscling the handle.
Finish strong
I put two air movers at opposite ends to cross-ventilate, cracked a window, and finished with a groom in one direction. Drying became even, reflectance matched, and stripes faded to nothing. The customer noticed the even look before I even pointed it out.
“Cadence creates control,” adds Eli Park, PT (APC Registered). “Even tempo beats bursts for cleaner outcomes.”
⚗️ My Chemistry Tests: Detergent, Rinse, and pH That Stopped the Lines
Why pH matters
When my rinse is near-neutral, the carpet doesn’t feel sticky and doesn’t flash bright/dull under light. High pH leaves films that glow when dry. On light residues, I’ve used a mild acidic rinse to bring pH back home without roughing up sensitive fibers like wool.
Dose like a pro
I match ounces-per-gallon to soil load, not mood. Over-dosing looks powerful but dries ugly. Under-dosing forces too many passes. The right dose plus a neutral rinse keeps fibers squeaky without the squeak—no film, no noise, no stripes, just a natural, even look.
“In kitchens and carpets, balance wins,” says Lina Duarte, NZQA L5 Culinary. “Too much or too little both ruin the finish.”
💨 My Water & Drying Tweaks: Hardness, Humidity, and Airflow
Softer water, softer landings
Minerals in hard water cling to fibers and leave faint lines. With softened water, detergents work better at lower doses, and the rinse leaves less behind. I aim under 5 gpg. It saves chemistry, reduces overwetting, and helps my dry passes actually remove what I loosen.
Even, quick drying
Uneven drying exaggerates contrast. I use crossflow fans so lanes dry at the same pace, especially near doorways and windows. In humid weather, I add a dehumidifier to guard against wicking. Speed matters, but evenness matters more; both together crush streaks.
“Drying is a race against wicking,” notes Priya Menon, CEM. “Shorten the race and you win the finish.”
🧰 My Gear Checklist: Wand, Nozzle, PSI, GPM, and Pass Pattern
Match PSI and GPM
Too much PSI with the wrong jet size floods fibers. Too little vacuum leaves rinse in the backing. I pair PSI with GPM so extraction keeps up with delivery. The goal is penetrate-and-lift, not soak-and-hope. Less drama in the hose means less drama on the carpet.
Wand angle, glide, and overlap
A worn glide digs tracks, and a sharp angle carves lines. I keep the wand flat, let the glide slide, and hold overlaps steady at 25–50%. My finish lane always runs the same direction to make light bounce uniformly. That’s the difference between clean and “wow.”
“Tool geometry writes the result,” says Hannah McKay, RPEQ. “Small angle changes make big surface patterns.”
📚 What Industry Experts Taught Me (And How I Applied It)
Neutralise and control moisture
Standards hammer home the basics: neutralise, don’t overwet, extract thoroughly. I embraced near-neutral rinses and strict wet-to-dry ratios. The carpet looked calmer, dried faster, and felt better underfoot. Customers stopped asking about lines and started asking for maintenance tips.
Groom for appearance retention
Grooming isn’t cosmetics—it’s engineering light. Combing lanes one way makes the whole room “read” as one tone. On cut-pile, this step is gold. On loop pile, it still helps the eye relax. I now treat grooming as essential, not optional.
“Appearance is engineered,” adds Oliver Gray, RIBA Architect. “Direction and rhythm make spaces feel even.”
🧵 My Fibre-Specific Tweaks (Nylon, Polyester, Olefin, Wool)
Nylon
Nylon shows “optical” streaks when the pile is crushed one way and fluffed the other. I use gentle agitation, neutral rinse, and a purposeful final groom. I avoid high heat that can stress tips. The payoff is a smooth, uniform sheen across the whole lane.
Polyester and olefin
These love oily soils that smear when overdosed. I go lighter on chemistry, rely on mechanical action, and rinse thoroughly with soft water. Dry passes are my safety net. The goal is lift and leave, not chase shine. Even strokes bring even results.
Wool
Wool likes cooler water and tighter pH. I keep it gentle, avoid aggressive agitation, and extend dry passes. A delicate groom makes the color look deep and calm. If I respect wool’s rules, it rewards me with a rich, even finish and happy customers.
“Fibers have personalities,” notes Sofia Ruiz, WoolSafe Licensed Tech. “Treat each the way it wants to be treated.”
☎️ When I DIY and When I Call a Pro
My red flags
If I see dye migration, seam peaking, or repeated wicking from previous floods, I pause. If adhesives might be compromised or backing smells musty, I don’t gamble; I document, ventilate, and call in a specialist. Prevention beats repair when structures are at stake.
Warranty and specialty fibers
For new installs under warranty or sensitive fibers, I stick to manufacturer ranges and certified processes. I keep notes on PSI, GPM, chemistry, and dry times. Paperwork protects the customer and me. If something feels off, it usually is—and that’s when I escalate.
“Know your stop line,” says Marcus Lee, NZ Registered Electrician. “When stakes rise, precision and documentation are everything.”
✅ My Prevention Checklist So I Don’t See Streaks Again
My simple order of operations
Pre-vac thoroughly. Right-dose pre-spray. Give dwell time. Agitate. Set PSI and GPM to match soil. Use softened water. Rinse near neutral. One wet pass, two to three dry passes. Cross-ventilate. Groom in one direction. Document settings and dry times.
The 80/20 rule
Most streak problems vanish when I control chemistry, water quality, pass tempo, and drying. I don’t chase magic products; I stack good fundamentals. When the base is right, even tricky carpets behave, and customers remember the room—not the lines.
“Routines reduce variance,” adds Nora Patel, Six Sigma Black Belt. “Most defects die when the process tightens.”
📊 My Case Study: How I Turned a Streaky Rental Lounge Around
The situation
Short-pile nylon in a rental, heavy traffic, alkaline residue from previous DIY cleans, and hard water. My first pass left faint bands. I re-ran a test square with softened water, neutral rinse, slower strokes, extra dry passes, and a final groom. The room evened out beautifully.
Mini Data (Before vs After)
| Item | Value |
|---|---|
| Rinse pH (before → after) | 9.0 → 7.0 |
| Water hardness (gpg) | 12 → <5 |
| Wet : Dry passes | 1 : 3 |
| Dry-to-touch | ~90 minutes |
| Customer feedback | “Even, no lines” |
“Feedback is a dataset,” says Tom Wu, PhD Data Science. “If it isn’t measured, it didn’t improve.”
❓ My FAQs About Carpet Streaks (Straight Answers)
Why do streaks show after drying?
Because light reveals differences once fibers settle. Residue, wicking, or nap direction become visible. A neutral rinse, soft water, extra dry passes, and grooming usually fix it. If stripes persist after a thorough groom, check your wand glide and nozzle pattern.
Can vacuuming remove streaks?
Sometimes. A slow, thorough vacuum can re-align the nap and reduce contrast. If residue is the culprit, vacuuming won’t solve it; a controlled, neutral rinse and balanced extraction will. I vacuum before cleaning and again after drying for the most even finish.
Are streaks damage or just appearance?
Mostly appearance. They’re usually direction, residue, or drying differences—not fiber injury. True damage involves heat, dye loss, or abrasion. If I suspect damage, I stop, assess under good light, and choose the least invasive correction that preserves the fiber.
How long until lines fade?
If it’s nap direction, a light groom can fix it immediately. Residue-related lines improve after a neutral rinse and even drying. Wicking may need a re-clean with better moisture control. Most of my fixes show within the same visit once airflow is set correctly.
Will vinegar help?
Vinegar is acidic, but I don’t wing it. I target near-neutral rinsing aligned to the fiber and prior chemistry. Random home brews can set soils or affect dyes. I prefer measured products, clear doses, and strips to verify pH so I’m correcting, not guessing.
“Rules beat hacks,” notes Jade Sinclair, PharmD. “Dose, verify, then trust the result.”
🧭 My Takeaways So You Don’t Repeat My Mistakes
Do this
Measure pH and hardness. Use softened water. Keep rinse near neutral. One wet pass, two to three dry passes. Cross-ventilate for even, quick drying. Finish with a single-direction groom. Record your settings so next time is easier and faster.
Not that
Don’t overdose chemistry. Don’t rush strokes. Don’t skip grooming. Don’t chase shiny add-ons before fixing fundamentals. When I slowed down and measured, my results sped up. Streaks aren’t mysterious—they’re messages that guide better technique.
“Simple scales,” finishes Luca Romano, ATPL Pilot. “Stable procedures turn turbulence into smooth landings.”
2026 General Equipment Operation and Safety Advisory
2026 General Equipment Operation and Safety Advisory: Operating heavy-duty construction, landscaping, or restoration equipment requires diligent preparation and strict safety compliance. Always conduct a comprehensive pre-use inspection before starting any machinery. Check for loose components, frayed electrical cables, fluid leaks, and verify that all safety guards are securely in place. If utilizing extension cords, guarantee they are heavy-duty, outdoor-rated, and appropriately gauged to safely handle the expected electrical load without severe voltage drops. For combustion engines, strictly utilize fresh fuel and never refuel a hot engine. Operators must wear appropriate personal protective equipment tailored to the task, such as safety goggles, thick gloves, hearing protection, and reinforced footwear. Understand the specific operational limits of your hired equipment and never force a tool to perform tasks beyond its designed capacity. Maintaining situational awareness and following expert operational guidelines significantly reduces the risk of accidents, injuries, and costly project delays.
Hire professional-grade equipment from 7 Hire. We offer fast local pickup or delivery across Auckland.