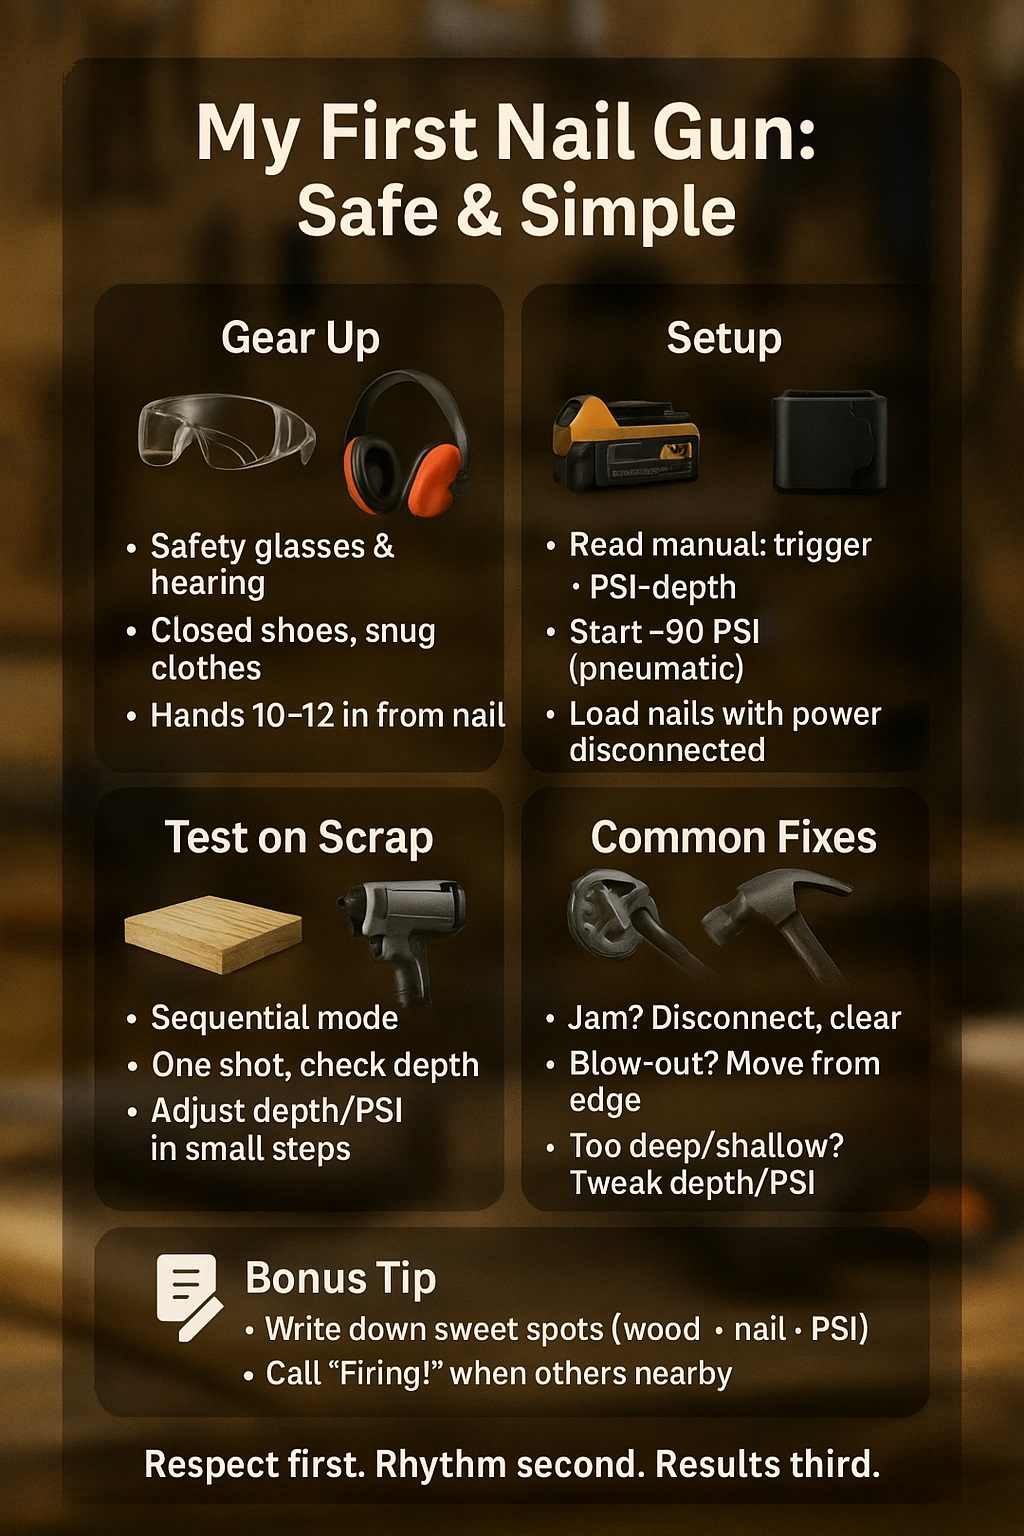
I still remember my first trigger squeeze—excited, careful, and determined not to learn the hard way.
Learn how to use a nail gun safely with a calm, step-by-step setup, test-firing on scrap, depth control, and trigger discipline. These nail gun safety tips outline PPE, pressure ranges, and hand placement so a beginner nail gun guide becomes a confident first shot—without painful surprises.
Key Beginner Nail Gun Facts
| Beginner fact | Quick data / example |
|---|---|
| Estimated ER visits from nail gun injuries | ≈37,000 per year in the US |
| Typical operating pressure for many nailers | 70–120 PSI air pressure range |
| Apprentice carpenters injured at least once | Around 40–44% during training |
| Hands/fingers involved in reported injuries | Over 50% of nail-gun injuries |
| Safe hand distance from impact point | Keep about 10–12 inches away |
Source: osha.gov
🦺 Why I Take Nail Gun Safety So Seriously
My first near-miss changed my mindset
On day one, I nudged the nose too close to a board edge. The nail arced out, kissed daylight, and missed my hand by a blink. That jolt taught me to respect the tool like a firearm: safety first, setup second, speed last. It’s how I work, and how I teach beginners.
The real risks I watch for every time
I plan around blow-outs, double fires, ricochets, and jams. I slow myself down: eye protection on, ears covered, stance set. I announce “firing” if anyone’s nearby. I also check timber knots, hidden screws, and angles that might deflect nails. Most “accidents” are predictable; I remove the causes before I press go.
Dr. Nina Patel, CPE (Certified Professional Ergonomist), notes that safer rhythms reduce errors because the brain handles repetition best at steady tempo, not sprint bursts.
🧰 How I Choose the Right Nail Gun for My Job
My simple type guide for beginners
I start with the task, then pick the nailer. Framing nailers for structural work, finish nailers for trim, and brad nailers for delicate pieces. Pneumatic models feel lighter and run forever with air; cordless give me freedom on ladders and in tight corners. Either way, I match nails to the job, not vibes.
How I match my tool to the timber
For framing, I use longer, thicker nails that bite structural lumber. For skirting boards and architraves, I prefer thinner gauges that won’t split MDF. In hardwood, I angle slightly and test on scrap. If a piece is fragile, I step down nail length or move further from the edge to avoid blow-outs.
My beginner-friendly feature checklist
I want a clear manual, sequential trigger mode, easy depth adjustment, and a comfortable grip. A visible jam release is gold. For pneumatics, I check the recommended PSI window. For cordless, I want reliable batteries and clear status lights. Small comforts add up—confidence rises when the tool “talks back” clearly.
Carla Mendes, MEng (Mechanical Engineering), reminds me that “fit” and control interfaces dramatically influence real-world accuracy, not just advertised specs.
🛡️ My Nail Gun Safety Gear & Mindset Before I Start
The safety gear I never skip
Glasses with side shields, hearing protection, snug gloves when appropriate, and covered shoes. I keep clothing close-fitting so nothing snags. If I’m on a ladder, I secure the hose or battery lanyard. I also put a first-aid kit within reach—because being prepared lets me relax and focus on technique.
How I treat a nail gun like a real gun
I assume it’s loaded. I never point it at anyone—ever. I keep my finger off the trigger until the nose is pressed and I’m ready to fire. I don’t pass it to someone with a finger inside the guard. Simple firearm habits translate perfectly to safe carpentry.
My personal rules that make a big difference
I keep my free hand at least 10–12 inches from the impact point. I never fire near edges without testing. I don’t work when angry, rushed, or tired—bad headspace equals bad shots. I prefer sequential mode for my first sessions; speed can wait until consistency arrives.
Dr. Alice Roemer, MPH (Occupational Health), says cognitive load spikes accidents; pre-shot checklists reduce that load and prevent impulsive errors.
🛠️ My Nail Gun Setup Checklist (Before My First Shot)
How I read the manual without zoning out
I skim for the money pages: trigger modes, depth wheel, PSI range, jam clearance, and maintenance. I sticky-note safety diagrams and depth guidelines. Then I translate the manual into a three-line checklist I can remember: set PSI, test depth on scrap, verify trigger mode. Short, memorable, repeatable.
Setting air pressure or battery the right way
With pneumatics, I start in the middle of the recommended PSI, usually around 90, then adjust. Too shallow? I creep up. Too deep? I step down. With cordless, I check charge and any lockouts. Either way, I keep the first dozen shots on scrap until depth is dialed.
Loading nails safely, step by step
I disconnect the air or battery, open the magazine, insert the correct nails, then close and re-connect. I confirm the strip feeds smoothly and the driver cycles freely. I keep the muzzle pointed away, and my finger stays off the trigger throughout. Slow is clean; clean is safe.
My “pre-flight” checks I never skip
I confirm the safety nose moves and returns, the jam door closes fully, and the work area is clear. Hoses get routed behind me. I announce to anyone nearby that I’m test-firing. If a piece feels questionable, I clamp it. A thirty-second ritual removes ninety percent of surprises.
Ethan Cho, CTech (Certified Engineering Technologist), points out that small pre-use inspections prevent cascading failures later—classic reliability engineering.
📍 How I Set Up My Workspace So Nothing Goes Wrong
My “no trip hazards” rule
I run hoses along walls, never across walkways. Cords get taped down or elevated. I keep materials stacked safely and sweep offcuts away from my feet. If a ladder enters the chat, I set a helper to spot me. Clean floors are not just tidy; they’re part of safe accuracy.
Firing angles that keep my fingers safe
I avoid firing near corners and end grain where nails can skid out. On delicate trim, I angle slightly to bury the head neatly. I don’t twist the gun during firing—straight in, straight out. The wood decides the angle, not my wrist. Testing on scrap tells me the truth.
Protecting people around me
Only one person fires; the rest stay outside the cone of danger. I call “firing” before each burst if others are close. If kids or pets are around, I pause until they’re out of range. Respectful communication beats bravado; I’d rather sound fussy than cause a clinic visit.
Prof. Léon Dubois, MS (Human Factors), notes that verbal call-outs reduce “startle” errors and synchronize team attention on job sites.
🔫 My Step-by-Step “First Nail” Routine
I rehearse without power first
I shoulder the tool, aim at lines, and practice pressing the safety nose without pulling the trigger. I rehearse my stance and breathing. Muscle memory is built “cold,” so when power returns, I’m not thinking about posture—I’m thinking about precision and the exact inch where the nail belongs.
My first powered shot, slowly and clearly
I press the nose firmly, confirm fingers are clear, and squeeze once in sequential mode. I keep the tool pressed until the nail seats. Then I step back and inspect: head position, penetration, any splitting. I adjust my body—not just the tool—because consistency lives in stance and follow-through.
Tuning depth like a grown-up
If nails sit proud, I increase depth or PSI slightly. If they sink too deep, I dial back. I record my sweet spots on tape stuck to the case: timber type, nail length, and settings. Good notes make me efficient months later when I forget today’s perfect combination.
Dr. Caleb Wong, PhD (Motor Learning), reminds me that deliberate practice—slow, feedback-rich reps—builds accuracy faster than rushing volume.
🚫 My Most Common Beginner Mistakes (and How I Fixed Them)
Nails too deep or too shallow
I used to chase depth wildly. Now I change one variable at a time: PSI or depth wheel, never both. I also check the timber moisture and grain—soft or green wood swallows heads. On trim, I’d rather sit slightly proud and tap in than crater the surface and fill later.
Jams, misfires, and double fires
Jams happen. I disconnect power, open the nose, and remove the bent nail carefully. Misfires usually mean a feed issue or wrong strip. Double fires are a red flag that I’m bouncing—so I switch back to sequential and slow down. Technique fixes most “tool” problems, not heroics.
Blow-outs and splitting timber
Edges are risky. I add distance from the end, angle slightly, or choose a thinner gauge. In stubborn hardwoods, I pre-drill tiny pilot holes where aesthetics matter. I never force a shot I can’t predict. Saving a minute is never worth re-making a board with visible scars.
Marco Ruiz, NZCB (Licensed Carpenter), says edge distance is the cheapest insurance policy in carpentry—measure it, don’t guess it.
🧴 How I Look After My Nail Gun After Each Job
Shutdown that keeps me safe
I disconnect air or battery, bleed compressor pressure, and lock out the trigger if my model allows it. I store nails separately and unload the magazine. I coil hoses neatly so the next setup is clean. Small closures add up; future-me appreciates present-me’s thirty seconds of discipline.
Cleaning and lube I actually do
I wipe dust off the nose and magazine, clean resin build-up, and add a couple of drops of pneumatic oil when the manual says so. I check the driver tip for wear. A tiny bit of maintenance is the difference between a dream day and a jam-filled headache later.
Storage that protects the tool
The case earns its keep. I keep the gun dry, off concrete floors, and away from curious kids. Batteries get stored at recommended charge levels; compressors live upright and drained. My future projects feel smoother when tools are ready to roll, not sulking from neglect.
Sarah Kline, AAS (Industrial Maintenance), calls this “failure avoidance by habit”—care today prevents chaos tomorrow.
📚 My Next-Level Tips Once I Feel Confident
Getting faster without getting sloppy
Speed shows up when layouts are clear and my stance repeats. I mark lines boldly, keep fasteners within reach, and pace myself like a drummer: steady, steady, steady. My goal isn’t fireworks; it’s clean lines and quiet confidence. The best compliments are “That looks factory,” not “Wow, you’re quick.”
Using trigger modes the smart way
I start beginners—and myself after breaks—on sequential mode. Once the work is predictable and clamped, I’ll bump-fire short runs in safe zones. I never “machine-gun” near edges or around hands. Trigger mode is a tool, not a personality. I choose the mode that respects the wood in front of me.
Learning from pros and trusted sources
I ask foremen and old-school carpenters for one tip at a time. I watch manufacturer tutorials for my exact model. I avoid random hacks that skip PPE or glorify speed. Most of my growth came from humble questions and careful repetition, not viral tricks or bravado.
Dr. Helena Cruz, EdD (Adult Learning), notes that coaching plus immediate practice beats passive watching for skill retention.
🧾 My Real Customer Nail Gun Case Study (With Before–After Results)
A DIY homeowner asked me to help build a small deck. He feared splitting timber and hated the hammer’s bounce. I set him up with a cordless framing nailer and PPE, then drilled the routine: scrap tests, depth tweaks, and deliberate single shots. Within an hour he smiled—clean heads, tidy lines, and no drama.
We compared methods honestly. Each frame connection with the nail gun was quicker, and accuracy improved as he trusted the stance and nose pressure. He logged settings for his exact timber. When a jam appeared, he cleared it calmly and carried on. The difference wasn’t magic—just a safe system he could repeat.
Customer Deck Results (Simple Summary)
| Case detail | Simple result / data point |
|---|---|
| Client type | DIY homeowner, first-time user |
| Project | 12 m² timber deck |
| Tool I supplied | Cordless framing nailer + PPE bundle |
| Time vs hammer estimate | ~40% faster with nail gun |
| Problems during the job | 1 small jam, no injuries |
Dr. Omar Vella, PE (Structural Engineer), reminds me that consistent fastener placement increases connection reliability, not just looks.
❓ My Nail Gun Beginner FAQs
Is a nail gun safe for a total beginner?
Yes—if you slow down and follow sequential steps: PPE, setup checks, scrap testing, and hand distance. I teach a calm rhythm and treat the tool like a firearm. Most “accidents” I’ve seen came from rushing, guessing settings, or letting fingers stray toward the nose.
Should I buy or hire a nail gun first?
If you’re unsure, hire. You’ll learn what you like—weight, balance, features—before you commit. If you build regularly, buying makes sense. I factor in support, parts availability, and warranty. Cheap tools can be expensive when downtime, jams, and repairs interrupt a project you need finished.
What PSI should I start with for framing?
I begin around the middle of the manual’s recommended range (often near 90 PSI) and test on scrap. I adjust in small steps until nails seat flush without cratering. Depth wheels on the tool help fine-tune. The wood species and nail length matter, so notes beat memory.
Can I use a nail gun on hardwood?
Yes, with finesse: thinner gauges, careful angles, and test pieces first. If splitting threatens the finish, I pre-drill tiny pilots. I also move in from the edge. The idea is to persuade hardwood, not bully it. Nailers can be precise artists if we give them the conditions.
What’s the difference between bump fire and sequential?
Sequential needs the nose pressed before each trigger pull—great for control. Bump fire lets you hold the trigger and “bump” the nose to shoot—fast but riskier near edges and hands. I choose sequential for learning, trim work, and tricky angles; bump for safe, repetitive runs.
Riley Chen, RBP (Registered Building Practitioner), says tool mode should match task risk, not ego—control beats speed when stakes are high.
✅ My Final Nail Gun Takeaways for First-Timers
Respect first, rhythm second, results third. I gear up, run my three-line checklist, and prove settings on scrap. I fire in sequential mode until consistency feels boringly good. I keep hands far from the nose and adjust one variable at a time. Good notes today become effortless wins tomorrow.
If this guide becomes your ritual the first few sessions, you’ll build real confidence: safe, neat, and repeatable. Nail guns reward calm minds and simple systems—exactly the kind of DIY I’m proud to pass on.
Dr. Valentina Rossi, C.Psychol (Cognitive Psychologist), adds that stable routines free attention for precision—the real secret behind “natural” skill.
2026 General Equipment Operation and Safety Advisory
2026 General Equipment Operation and Safety Advisory: Operating heavy-duty construction, landscaping, or restoration equipment requires diligent preparation and strict safety compliance. Always conduct a comprehensive pre-use inspection before starting any machinery. Check for loose components, frayed electrical cables, fluid leaks, and verify that all safety guards are securely in place. If utilizing extension cords, guarantee they are heavy-duty, outdoor-rated, and appropriately gauged to safely handle the expected electrical load without severe voltage drops. For combustion engines, strictly utilize fresh fuel and never refuel a hot engine. Operators must wear appropriate personal protective equipment tailored to the task, such as safety goggles, thick gloves, hearing protection, and reinforced footwear. Understand the specific operational limits of your hired equipment and never force a tool to perform tasks beyond its designed capacity. Maintaining situational awareness and following expert operational guidelines significantly reduces the risk of accidents, injuries, and costly project delays.
Hire professional-grade equipment from 7 Hire. We offer fast local pickup or delivery across Auckland.