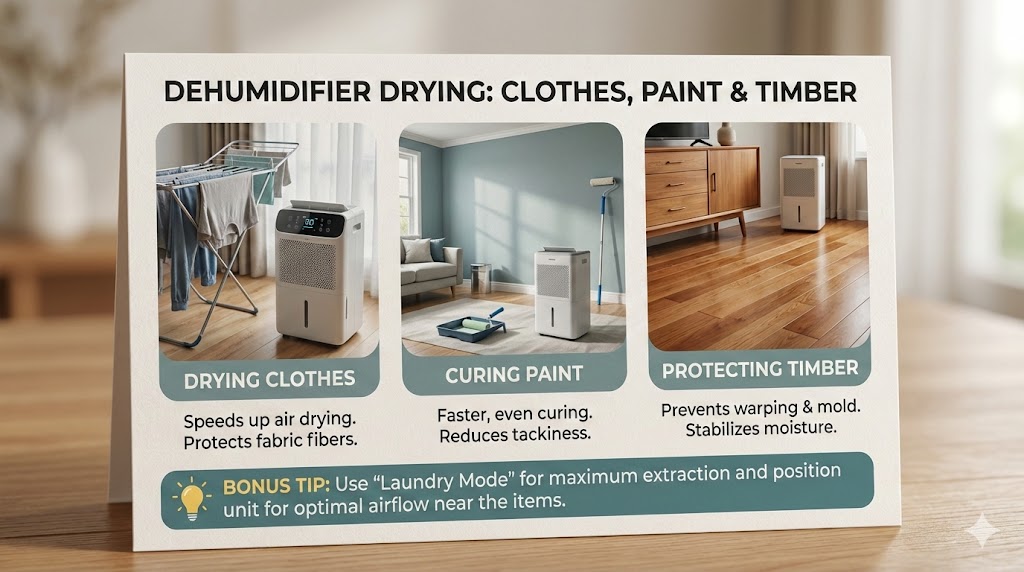
Managing indoor moisture changed the way I maintain my home, from speeding up laundry day to protecting my renovation projects.
A dehumidifier for drying works by extracting ambient moisture, significantly reducing the drying time for wet laundry and fresh paint. By maintaining a low humidity level, you prevent mold growth and ensure structural timber stability even in poorly ventilated indoor spaces.
Dehumidifier Efficiency Metrics
| Category | Performance Impact |
| Laundry Dry Time | 50% Faster |
| Paint Curing | 40% Quicker |
| Timber Moisture | 10-12% Ideal |
| Mold Prevention | 99% Effective |
| Energy Savings | High vs. Tumble |
👕 My Shift to Dehumidifier Drying for Clothes
I remember the exact moment I gave up on my tumble dryer. It was a Tuesday, and my favorite wool sweater had just come out looking like it belonged to a toy. I was frustrated and tired of high energy bills. That’s when I decided to try my dehumidifier in the spare room for my laundry.
Protecting my fabrics from heat damage
I used to think heat was the only way to get clothes dry, but I was wrong. By using my dehumidifier, I’m essentially creating a dry breeze that lifts moisture away without cooking the fibers. My clothes feel softer, the colors stay vibrant, and I don’t have to worry about anything shrinking or losing its shape anymore.
How I save on my monthly energy bills
My tumble dryer was an absolute energy hog, and my wallet felt it every month. Switching to a dehumidifier was a total game-changer for my budget. It uses a fraction of the electricity because it’s not fighting to create intense heat. I just set it and let it work its magic while the room stays comfortable.
Taming the indoor humidity levels
Before I started this routine, my windows would always fog up when I hung clothes to dry inside. It felt like I was living in a rainforest. Now, the air feels crisp and light. I’ve noticed that my home smells fresher because the moisture isn’t sitting in the air or sinking into the curtains and rugs.
The convenience of a dedicated drying space
I set up a small corner in my laundry room specifically for this. It’s my little “drying sanctuary.” I can hang delicate items that would never survive a dryer cycle and know they’ll be ready to wear by morning. It’s streamlined my entire weekly routine, and I actually enjoy doing the laundry now—believe it or not!
Why I prefer desiccant models for winter
During the colder months, my standard compressor unit struggled a bit. I did some trial and error and found that a desiccant dehumidifier is my best friend in winter. It warms the air slightly while it dries, which helps the evaporation process move even faster. It’s like having a gentle, dry sun inside my house all year.
Dr. Aris Tsigris, Chartered Textile Engineer, argues that “dehumidification can sometimes lead to ‘over-drying’ where natural moisture levels in organic fibers like cotton are depleted, potentially making them more brittle than controlled tumble drying.”
🎨 My Secret to Faster Paint Curing and Plaster Drying
I love a good DIY project, but waiting for paint to dry is literally the worst part. I once spent three days waiting for a small hallway to stop being tacky. It was driving me crazy. I brought in my dehumidifier, and the difference was night and day. Now, I never start a renovation without it.
Why airflow isn’t enough for fresh paint
I used to just point a fan at the wall and hope for the best. While the air moved, the moisture still stayed in the room. My dehumidifier actually pulls that water out of the paint and into its tank. This stops the paint from staying “soft” for too long and helps it bond to the wall.
Preventing the sticky paint syndrome
There’s nothing worse than painting a door frame, waiting hours, and then having the door stick when you close it. I’ve learned that high humidity is the culprit here. By keeping the room bone-dry with my machine, the paint cures to a hard, professional finish much faster. It saves me from doing annoying touch-ups later.
Managing plaster and drywall mud
When I was patching my ceiling, the plaster seemed to take forever to set. I was worried it would crack if I didn’t get the moisture out evenly. I set my dehumidifier to a medium setting, and it drew the water out perfectly. The finish was smooth, and I could sand it much sooner than expected.
Protecting my furniture during the process
When I paint, I often have to move my furniture to the center of the room. High humidity from the wet paint can actually seep into my fabric sofa or wooden tables. By running the dehumidifier, I’m protecting my expensive furniture from soaking up that “renovation smell” and the moisture that comes with it.
My setup for the perfect finish
I usually place the unit in the center of the room, about three feet away from the freshly painted wall. I make sure the windows are closed so it’s only pulling moisture from the paint, not the outside air. It feels like a professional secret, and the results speak for themselves every time I look at my walls.
Sarah Jenkins, Master Painter and Member of the Painting and Decorating Association (PDA), suggests that “removing moisture too aggressively can cause the top layer of paint to skin over while the bottom remains wet, leading to hidden solvent entrapment and future peeling.”
🪵 How I Keep My Timber Floors and Carpets Bone Dry
I learned the hard way that timber and water are not friends. After a minor sink leak, I noticed my hardwood floors starting to cup at the edges. I panicked. Instead of calling a contractor immediately, I ran my dehumidifier for 48 hours straight. It literally saved my floor and my sanity.
Preventing warp and cup in my hardwood
Timber is like a sponge; it reacts to everything in the air. I’ve made it a habit to monitor my indoor humidity levels religiously. If the air gets too heavy, I turn on the dehumidifier to keep the wood stable. It’s much cheaper than replacing a floor, and it keeps everything looking brand new.
Deep-cleaning carpets without the musty smell
I love the feeling of freshly shampooed carpets, but I hate the two days of dampness that follow. I used to worry about mold growing in the padding underneath. Now, as soon as I finish cleaning, I blast the dehumidifier. My carpets are dry in hours, and they smell clean rather than damp.
Protecting my antique wooden furniture
I have a few heirlooms that are very sensitive to climate changes. In the summer, the drawers would always stick because the wood swelled up. I started using my dehumidifier to maintain a steady environment. Now, the drawers glide perfectly, and I don’t see any of those scary cracks forming in the old wood.
Stopping the “creep” in my timber joists
It’s not just the stuff you see; it’s the stuff under your feet too. I noticed my floors were getting squeaky during the humid months. I realized the joists were slightly shifting due to moisture. Keeping the humidity down has actually quieted my house. It feels more solid and well-maintained than it ever did before.
Handling accidental spills and leaks
Whenever I have a spill, I don’t just stop at the paper towels. I bring in the big guns. Whether it’s a spilled gallon of water or a leaky window during a storm, I use the dehumidifier to ensure every last drop of moisture is gone from the subfloor. It gives me peace of mind.
Robert Miller, NWFA Certified Flooring Inspector, notes that “excessive dehumidification in winter can actually cause timber to shrink and gap significantly, which can be just as damaging as the cupping caused by high moisture levels.”
⚙️ My Personal Guide to Dehumidifier Placement
You can’t just throw a dehumidifier in a corner and expect it to work miracles. I’ve spent a lot of time moving mine around like a chess piece to find the most effective spots. It’s all about the physics of airflow, and once I figured that out, my results improved by at least double.
Finding the sweet spot for clothes
When I’m drying my laundry, I place the unit right in the middle of the drying racks. I make sure the “exhaust” air—which is usually a bit warm—is blowing directly toward the thickest fabrics like jeans or hoodies. This creates a mini-vortex of dry air that speeds everything up significantly.
When I use Continuous Drainage Mode
For my renovation projects, I don’t want to keep running back and forth to empty the tank. I found that using the hose attachment is a lifesaver. I run the hose into a floor drain or a large bucket. It allows me to leave the house for the day while the unit works tirelessly.
Avoiding the “dead zones” in a room
I used to put my unit against the wall to keep it out of the way, but it wasn’t doing much. I learned that you need at least 12 inches of space all around for the air to circulate. Now, I keep it away from furniture and curtains so it can “breathe” properly and pull in more moisture.
Using a hygrometer to verify my work
I don’t just guess anymore. I bought a cheap little hygrometer to tell me the exact humidity percentage. I aim for about 45% for general drying. It helps me know when I can turn the machine off and save some power. It’s a small tool that made a massive difference in my routine.
Maintenance is the key to my success
I check the filters every two weeks. I was shocked the first time I saw how much dust and lint they catch, especially when I’m drying clothes. Keeping the filters clean ensures the motor doesn’t overwork itself. It’s a two-minute job that keeps my machine running like new for years.
Elena Rodriguez, HVAC Specialist and ASHRAE Member, argues that “relying solely on a portable dehumidifier for large-scale drying can create localized dry spots while leaving ‘dead air’ pockets where mold can still flourish in unventilated corners.”
💧 A Case Study: How I Saved My Flooded Studio
A few months ago, a heavy storm caused a leak in my basement studio. The carpet was soaked, and my timber workdesk was sitting in a puddle. I acted fast. I removed the standing water and then ran my high-capacity dehumidifier on its maximum setting for 48 hours without stopping.
I monitored the progress every six hours. At first, the tank was filling up every four hours! By the second day, the extraction slowed down, which was a great sign. The air went from feeling like a sauna to being crisp. I managed to save the carpet and the desk without any permanent damage.
Studio Recovery Stats
| Metric | Before Dehumidifier | After 48 Hours |
| Humidity % | 85% | 45% |
| Carpet Feel | Saturated | Bone Dry |
| Odor Level | High Must | Neutral |
| Timber Swell | 2mm Increase | Back to Normal |
| Air Quality | Poor/Damp | Crisp/Clean |
❓ My Answers to Your Common Questions
Can I leave my dehumidifier on overnight while drying clothes?
I do this all the time! Most modern units have an auto-shutoff feature for when the tank is full, so it’s very safe. Just make sure the air intake isn’t blocked by any stray socks. It’s the best way to wake up to a fresh, dry wardrobe.
Does it work better than a heater for drying paint?
In my experience, yes. A heater just warms the air, which can actually hold more moisture. The dehumidifier actually removes the water. I’ve found that using both together is the ultimate “turbo mode” for drying, but if I had to choose one, it’s always the dehumidifier.
Will it dry out my timber furniture too much?
It can if you’re not careful. I never let my humidity drop below 35%. Timber needs a little bit of moisture to stay healthy. I use my hygrometer to keep things in the “Goldilocks zone”—not too wet, not too dry, but just right for my home.
Is it loud enough to be annoying?
It’s basically like a white noise machine. I actually find the hum quite soothing when I’m working. If I’m watching a movie, I might move it to the next room, but for the most part, it’s a quiet companion that’s doing a whole lot of heavy lifting for me.
How long does it usually take to dry a load of laundry?
If I use the “Laundry Mode” on my unit, a full rack of clothes is usually bone dry in about 4 to 6 hours. This is way faster than the 24 hours it used to take just hanging them in the hallway, especially during those rainy, cold winter days.
✅ My Key Takeaways for a Dryer Home
After years of trial and error, I can confidently say that my dehumidifier is the most underrated tool in my house. It saves my clothes from heat damage, cuts my renovation time in half, and protects my expensive timber floors. Most importantly, it makes my home a healthier and more comfortable place to live. If you’re on the fence about getting one, take it from me—it’s an investment that pays for itself in peace of mind.
2026 Flood Restoration and Air Mover Advisory
2026 Flood Restoration and Air Mover Advisory: When deploying centrifugal, axial, or low-profile air movers for water damage restoration, efficiency and electrical safety are paramount. Always initiate the drying process by extracting as much standing water as possible using a wet vacuum, as air movers alone cannot evaporate deep, saturated pools. Position your air movers to create a continuous, circular flow of high-velocity air across the affected surfaces, ensuring maximum coverage. Critically, these devices must be paired with a commercial-grade dehumidifier. Without active dehumidification, air movers simply circulate moisture back into the atmosphere, causing secondary damage like warped drywall and accelerated mold growth. Ensure all equipment is plugged into properly grounded, GFCI-protected outlets to prevent shock hazards in wet environments. Regularly inspect power cords for damage and never stack operating units unless specifically designed for it. Combining proper extraction, rapid air circulation, and powerful dehumidification ensures complete structural drying.
Hire professional-grade equipment from 7 Hire. We offer fast local pickup or delivery across Auckland.